Showing posts with label Food. Show all posts

Thursday, August 20, 2015

Recipe: Super Easy Banana Ice Cream

 
 Today I have for you a recipe anybody can make. Now that I'm a mom, I love recipes that are extremely simple with only a few ingredients. Something that tastes yummy but takes mere moments to whip up? Yep, I'm all in.

This recipe I am calling "Super Easy Banana Ice Cream" - it's something I actually saw on Facebook, and decided to give it a try today since I happened to have bananas on hand. My husband loves ice cream, but I'm not a fan of all the sugar and calories, so it isn't something we buy often. I figured I would make this slightly healthier version.


This isn't your traditional homemade ice cream, which can be somewhat cumbersome to make. All you need is:

- Bananas
- Toppings/flavorings of your choice

....that is IT. See, I told you it was easy! I used 3 bananas because I didn't want to make a huge batch just in case I didn't like it (I will definitely make a bigger batch next time). I chose peanut butter and Planters Salted Caramel peanuts as my flavors.

Step one, cut a hole in a box...

Kidding, I'm kidding. This isn't that type of recipe.

Step 1: Slice Bananas

 Peel and slice the bananas.

Step 2: Cover & Freeze

 Cover the banana slices in an air-tight container (I'm really fancy so I used an old Chinese food container). Freeze the bananas until they are solid, about an hour or two should work.

Step 3: Process Bananas in Blender 

 Put your frozen banana slices in a blender/food processor and process until creamy. I added a splash of skim milk at this point because my blender needs a little liquid to get going.

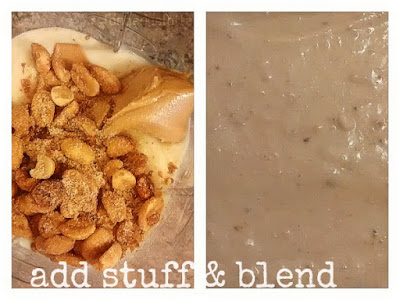
Step 4: Add Stuff...Blend Again

Add your flavorings of choice to the creamy banana mixture. I added a glob of peanut butter (how's that for super specific measurements? Ha. I don't really measure things when I cook, I pretty much just eyeball; I would say I used maybe 1/4th cup...maybe less than that). As for the salted caramel peanuts, there wasn't much left in the container so I used the rest. Probably just a few tablespoons. Those peanuts are crazy amazing, by the way. Try them.
 
Blend it all up, pour the mixture back into your container, cover, and freeze.

Step 5: Freeze & Enjoy!

 And that's all there is to it!

I thought this came out pretty good. It isn't quite like real ice cream, it has more of a frozen yogurt type consistency, but it hits the spot when you want something cold and sweet. My husband really loved it and wants me to make it again soon, so, that's a plus!

I think it would be fun to come up with all kinds of combinations, I bet strawberries and chocolate would be awesome with it.

Let me know if you make this recipe and if you come up with any interesting combos.

Have fun!

Tuesday, March 25, 2014

Review: Special K Coffeehouse Protein Breakfast Shakes


Being familiar with Special K products, I was looking forward to trying these. I love Special K cereals (the Vanilla Almond cereal is my favorite) and breakfast bars. Special K offers low calorie cereals, snacks, and drinks, while still providing plenty of yummy flavor.


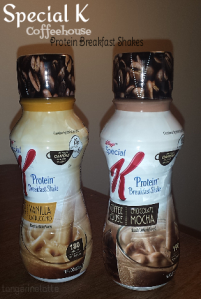
PicsArt_1395760566933 Instead of having my usual cup of coffee this morning, I decided to try Special K's new Coffeehouse protein breakfast shakes. I received the flavors Chocolate Mocha and Vanilla Cappuccino for review.
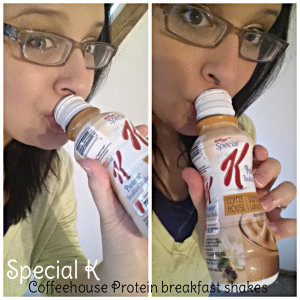
PicsArt_1395760669888The Coffeehouse protein breakfast shakes are no different from Special K's usual quality. Chocolate Mocha has a smooth, creamy chocolatey flavor, with just a hint of coffee taste. Fans of chocolate will love this flavor - it reminds me of chocolate milkshakes or brownies.
My favorite flavor of the two, though, is Vanilla Cappuccino. I love vanilla flavors in general, so I'm not surprised I gravitated more towards this flavor. It has a soft, sweet vanilla flavor, with just a hint of the cappuccino taste coming through. Personally, I love coffee, and I would have preferred a stronger coffee taste. However, people who aren't huge coffee drinkers will be pleased that the coffee taste in these drinks are very subtle.
I also like the slightly thick texture of the shake, it provides plenty of "substance".
My husband is the type who runs off to work without having breakfast, and I can imagine that these Coffeehouse protein shakes would be great for people like him. The 10 ounce bottle is shaped perfectly to fit into your hand. Grab one of these, fly out the door, drink on the go, and start your day.
I let my hubby have a sip of the drinks, and he really liked them, too. He preferred the Chocolate Mocha flavor (hey, whatever, more Vanilla Cappuccino for me!) He also mentioned how these taste so much better than your average protein shakes - he likes to have protein shakes a few times a week, especially after a busy day or a workout. Sometimes those protein shakes have a gritty texture and gross flavor - I'm sure you know what I mean, if you've ever had a protein shake, sometimes they can be hard to finish. But these... they're good.
They have 10 grams of protein, 5 grams of fiber, and under 200 calories. With as much caffeine per serving as a cup of coffee, I definitely would not mind occasionally switching up my usual morning coffee routine and drinking these. They taste awesome!


PicsArt_1395784439016

Disclaimer: I received the items in this review as a sample from BzzAgent.

Saturday, October 12, 2013

TIL: I Can't Do Sushi

Today I learned: I can't do sushi.

Nope. I've tried. It just isn't my thing. I have friends who swear by it, and my husband just loves it.

My husband hasn't had sushi in many years. Our town basically consists of fast food chains. So, when a new Japanese steakhouse opened in our tiny town, we were both excited to try something new. Today we decided to make a date of it and went out for lunch.
 
We ordered crab wontons for an appetizer. They were very good. Give me a plate of those and I'll be a happy girl. Then I ordered steak, rice,  and veggies for my meal, and Mark ordered a sushi plate.

He offers me a bite of some tuna something or other sushi. I flashed back to that time when I was a kid and tried it for the first time, and hated it. But I figured eh, why not step out of my comfort zone and give it another shot.

Yeah....no.

I totally didn't like it at all. The flavor completely turned me off. It was like my stomach clenched up and said WTF.

I can't go for that. No can do. 

I'm glad other people love sushi, but it's a taste I just haven't acquired!

But my steak and vegetables were absolutely delicious. And Mark loved his sushi. So it was nice, even though that sushi was slightly traumatizing for me. Lol.
Japanese food, y'all.

Tuesday, July 9, 2013

Perfect Pizza Crust - using a bread machine


I have a guilty pleasure. It's pizza. Man, let me tell you, I love pizza - I could eat it every week, on a daily basis, and not get sick of it.

I don't, of course, but I totally would. My husband loves pizza too, but not passionately as I do, LOL. Since getting my bread machine, I decided I'd like to try to make my own pizza crust. I've used pre-made pizza crusts before, from Pillsbury, or box mixes, or frozen dough. Those are good, and all... but what if I could do it better? And cheaper?


Turns out, a bread machine can make a pretty delicious pizza crust. This is an easy meal to make and better than driving to your local pizza place or waiting for a delivery. This recipe makes about a medium to large size pizza, depending on how thick or thin you like your crust. Check it out:


Thursday, June 27, 2013

Wine Steak Marinade: How to turn a cheap steak into something delicious

Sorry for no posts the last few days. My laptop went kaput - after downloading some free fonts and Photoshop brushes, the blue screen "of death" kept showing up. Not good! I can no longer use it for the time being. I have a guy taking a look at the laptop, and hopefully he can bring it back to normal. I do have a small old netbook I can use for the meantime, at least. It's kind of hard to type on this tiny keyboard, but I wanted to at least post something,

I'm working on my second quilt - It's coming along slowly but surely. Here's a peek:


Hey... how about a recipe?

I got some cheap steak on sale at the grocery store, and I wanted to figure out a way to make it super tender and juicy. The last time I made steak, it was rather tough to chew and dry.

I found this recipe online, and decided to try  it tonight. I did not use every ingredient on the list, I modified it based on personal preference and the ingredients I had on hand  - the ingredients I did use are in bold. My personal notes are in italic.

Ingredients

    • 1/4 cup vegetable oil (I used olive oil)
    • 1/2 cup red wine
    • 1 tablespoon lemon juice
    • 1 tablespoon balsamic vinegar
    • 1/4 teaspoon oregano
    • 1/4 teaspoon ground cumin
    • 1 clove garlic, minced (I used garlic powder)
    • 1 teaspoon sugar
    • 1/4 teaspoon salt
    • 1/4 teaspoon pepper (I used lemon pepper)  
    • Not in recipe, but I also added onion powder, about 2 TBSP each of: Worcestershire sauce, low sodium soy sauce, and BBQ sauce. 

Directions

  1. In a heavy-duty plastic food bag, mix all ingredients well.
  2. Place steak in marinade and seal bag tightly. (I also poked a few holes in the steak)
  3. Place in refrigerator for at least 4 hours, inverting bag every hour. (I marinated about 7 hours)
  4. Marinade can be used to baste steak while grilling.

The steak was absolutely delicious, juicy, and tender. My husband and I loved it. The longer you can marinate, the better, if you have time. I'm sure it would have been awesome if I used ALL the ingredients, too.

Sunday, June 23, 2013

The best white bread machine recipe (1.5 lb)

As a wedding gift from a family member, my husband and I received a Target gift card. After debating about what to purchase with it, we finally decided to get a Black & Decker bread machine.

We felt this would be an appliance we would use regularly - who doesn't love freshly baked, homemade bread?! I could hardly wait to get it home and experiment with it. The weird thing is, the manual did not come with a recipe for a basic white bread - which, you would think, any bread machine manual would include.

So, after making several bread loaves and experimenting with recipes, I found this to be the BEST recipe yet. This makes an awesome loaf - flaky, slightly crispy crust, and soft inside. Great taste, and makes awesome sandwiches and toast.

Ingredients:
1 cup warm water (110 degrees F/45
degrees C)
2 tablespoons white sugar
1 (.25 ounce) package bread machine yeast

1/4 cup vegetable oil
3 cups bread flour
1 teaspoon salt
Directions:
1. Place the water, sugar and yeast in the pan of the bread machine. Let the yeast dissolve and foam for 10 minutes. Add the oil, flour and salt to the yeast. Select Basic or White Bread setting, and press Start.

Also, the recipe calls for bread flour, but I've used all purpose flour as well and it comes out good either way.

It doesn't get much easier! 3.5 hours later, you have an awesome loaf of bread that tastes better than store-bought.